Do you want to Journey to the Center of the Earth?


Peter Montgomery is hoping to build a "Journey to the Center of the Earth" style drill as an art installation/halloween decoration.

The problem? Lack of funds. If you'd like to support his endeavor, throw him some spare change over on Kickstarter.

For more on Peter's past Halloween displays (he's legit), check out this post.

Kickstarter works in a pretty neat way: The rules are really simple: If you make or exceed your funding goal by the specified deadline, you get the money. If you don't make the goal, you get nothing. In my case, my deadline is October 14, so there are 21 days to raise the money. Also, people get gifts to thank them for pitching in.

It's not very often you get to help out on something this cool.

Hanging On...


The post on ways to hang pictures generated a lot of comments -- many people pointed out ways to upgrade the "pants hanger" -- darker wood, painting the metal, adding metal decorations to the wood, etc. The best idea, however, came from an email from Jen, who suggested using Victorian spring clips. You can see what they are and how Jen uses them above.


You can buy them at Lee Valley Hardware, where they come in 2 different styles. The drilled hole in the back lets you hang them on a nail.


Victorian Spring Clip. 4" long overall and 2-1/2" wide at the tip, it weighs about 7 oz.
They are $6.20 for one, $4.49 if you buy 6 or more.


Cast Steel Spring Clip. The cast steel is a bit bigger at 4-1/4" long overall and 2-1/2" wide at the tip, it weighs about 6 oz. $8.80 for one, $7.10 for 6 or more.

For my purposes I think two at the corners of a large print (and perhaps two more at the bottom? I think I'll have to experiment...) would be as cheap as a poster frame, and walk the casual vs Victorian style line that I want my office to have.

Surprising Chandeliers from Bicycles


Carolina Fontoura Alzaga makes chandeliers out of recycled bicycle parts. These are not just your run of the mill recycled lighting (although we love those too!). These are grand statements fit for your entry hall or ballroom. I love how they mimic the look of traditional crystal chandeliers, but with a lot more edge.


From her artist's statement:

This body of work draws inspiration from Victorian chandeliers, DIY and bike culture, and the use of unartistic materials....

These subversive objects challenge the aesthetics of wealth by visually contrasting the classic elegance of the candelabrum with the newfound elegance of discarded, mechanical bicycle parts.


Don't have a ballroom or a grand staircase? How about some smaller scale sconces for a hallway?

Carolina emailed me, but I had already seen her work thanks to a feature on Treehugger that Michael pointed out to me.

Clayton Boyer Clock Designs


If you're not the sort of person who can design clockworks and build them in metal (say, Eric Freitas), there may still be hope for you. Clayton Boyer will sell you woodworking plans for building your own clock.


And if you're really hard core, there's the masochist's corner. These plans, you have prove yourself worthy in order to buy.


Thanks, Koen, for pointing these out.

Hangers for hanging...

I've been looking for some cost-effective way to hang some Haeckel prints I'm printing up at Costco in my new Victorian science lab inspired office, and remembered this idea:


(found at AT, but I think it originally was featured in Real Simple or Ophrah.)

(via Window Ledge Arts.)

It hits the "gadget" "wood + metal" and "vintage" buttons, but does seem a bit informal. (But it's definitely cheap, and would be easy to change!) What do you think?

Hearst Castle's Study


Been exhausted lately, but thought you might like this image I stumbled across, if you haven't seen it the many places it has been reblogged.

via.

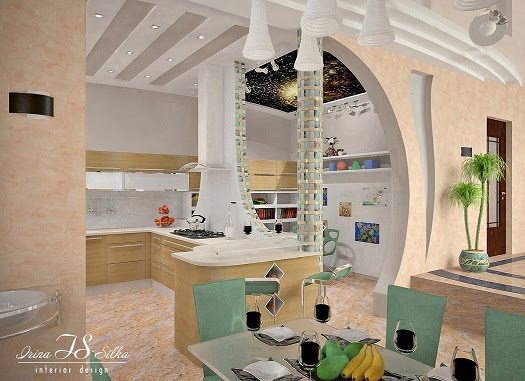
Irina Silka Project on 3D Kitchen and Kids Study Room

Irina Silka Project on 3D Kitchen and Kids Study Room
Irina Silka is a young architectural designer from Ukraine, she create several amazing project by using software such as 3D Max, Vray, AutoCAD, and Photoshop. Here are several projects from Irina Silka, taken from deviantart.

Irina Silka Project on 3D Kitchen and Kids Study Room


Irina Silka Project on 3D Kitchen and Kids Study Room


Irina Silka Project on 3D Kitchen and Kids Study Room

Irina Silka Project on 3D Kitchen and Kids Study Room

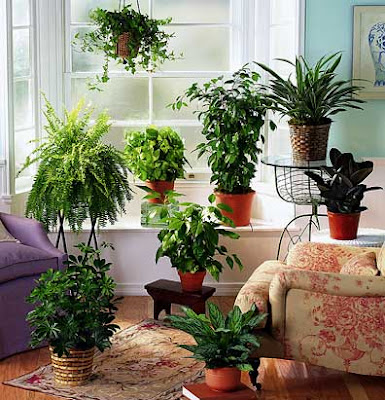
Bring a Green Atmosphere into Your House with Indoor Plants

One of good idea to bring the convenience of green atmosphere into your house is by completing it with indoor plants. Many ways to decorate your home interior, and indoor plant in your interior is a example ways to decorate your home. Keeping house plants is the best way to decorate out home. Both, indoor and outdoor plants are not only used as decorative items, but also grown for other benefits. The most important benefit of keeping house plants is that they purify the air.
 Bring a Green Atmosphere into Your House with Indoor Plants
You can choose the Tulsi, Mother Fern, Aloe Vera, or Chinese Evergreen, all of them are can make our interior become convenience while spending our days in our house.
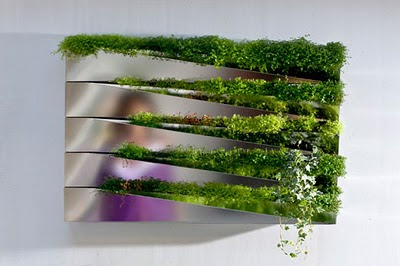
Bring a Green Atmosphere into Your House with Indoor Plants

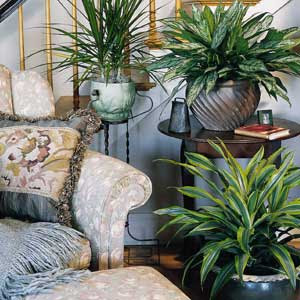
Bring a Green Atmosphere into Your House with Indoor Plants

Resto in the Fall

A number of you asked if I'd seen the fall Restoration Hardware Catalog. I had! I just took me a while to get this post together. Here's my favorite rooms from the catalog, and some of my favorite pieces.

I love the cast iron trolley lights. I actually have two tractor seats like these on my front porch (a thrift shopping score!) -- as cool as they look, Ben hates them because they aren't that comfortable.


Setting the coffee table on a wood pallet is a neat trick -- I love the interplay of materials: wood, stone, leather.

I've liked armillary sphere chandeliers for a long time, and this one is no exception. Don't miss the brass hour glasses. All this room needs is a telescope in the corner by the window to be the very comfortable lair of an amateur astronomer.

For my specific picks, I've put together another Kaboodle list:

Kitchens at Home Depot -- by Martha Stewart!

This has potential: Home Depot is now working with Martha Stewart on a kitchen line -- cabinets, countertops, and hardware. I know, Martha isn't steampunk, but her style is much more co-optable than most other affordable kitchen options, and Home Depot is a lot easier to find and order at than Ikea for most parts of the country.

Here's my favorites from the collection:

This "Turkey Hill" cabinet is very similar to the Ikea Liljestad I ended up chosing for my kitchen -- however the glass door options are much cooler with the Martha Steware line. (There's one called webwork that looks like leaded glass!) Also notice how this kitchen combines two different cabinet colors -- one for the perimeter and another for the island. I think this is a great way to create an eclectic look (consider one color for the upper cabinets and another for the lower ones).

This style -- Dunemere -- is a bit too "arts and crafts" for me, but check out the backsplash and countertops. They are a Martha branded Corian in a color called "Bedford Marble." Corian has a lot going for it, but I was never able to find it in a style that looked enough like marble (not granite!). (I ended up with real marble, and am loving it.)

This is my favorite of the three. Instead of wood, it's a laminate (read: probably cheaper). The color here is just perfect for a vintage farmhouse, and I think the slightly legged kickplates under the cabinets pull the look together.

As someone whose managed to redo two kitchens in the last year, a part of me wishes these had come out 6 months earlier.

What do you think? Could you use these in a steampunk kitchen?

Book Bookshelf


We're a big fan of book and library based decor around here, and Rich found this article in the Sacramento Bee about how to build an extremely simple shelf from a hardback book...


Notice how they match the spine color with the wall color. And it's always fun to create thematic shelves based on your pick of books e.g. cookbooks or a knife based murder mystery (how about "Slip of the Knife" or "A Knife to Remember") for a kitchen.

Buzz Saw Blades....


My friend Rosa sent me this chandelier from 1st dibs it's an artisan crafted giant orb chandelier from buzz saw blades, machine parts and industrial salvage.

Tips on Designing a Landscape Garden with Planting Grass Seed

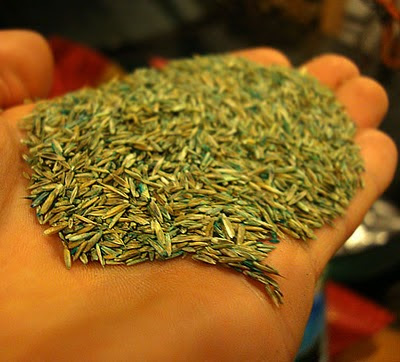
Like any other plant, grass seedTips on Designing a Landscape Garden with Planting Grass Seed must be properly planted in order to grow. Although nothing can guarantee a perfect lawn, here are some tips that will stack the odds in your favor.

Picking the Seed 

For most places, you will want to use a mix that will thrive in both sun and shade. Read the bags carefully and choose a seed that will grow well in the conditions you have. For instance, while Kentucky Bluegrass is beautiful, it is high maintenance and a challenge to grow in some areas of the country.
Tips on Designing a Landscape Garden with Planting Grass Seed

Preparing the Soil 

Get a large quantity of fresh topsoil and spread it evenly over the area. Make sure it is at least 3 or 4 inches deep. Break up any sizable clumps. Although it’s easier if the soil remains relatively dry while you plant, don’t worry if you are interrupted by rain.    


Spreading the Seed 

Don’t spread the seed by hand. You won’t get the proper distribution and your grass will grow in clumps. For a small lawn, you can use a hand crank broadcast spreader. For larger lawns, a push spreader is ideal.
To improve the distribution, if you have enough seed, repeat the application over 2 or 3 consecutive days.
Tips on Designing a Landscape Garden with Planting Grass Seed
  

Cultivating

Once spread, use a rake to work all the seed into the soil. Keep in mind that any that remains visible will likely become birdseed.
Tamp the soil to 'lock' the seed underneath, and level as much as possible. Then water the entire area liberally. Continue watering generously on a daily basis until the grass sprouts evenly. In most cases this is 1 to 2 weeks.
Water at a time of day when the water drops on the new grass won’t burn it—generally late in the afternoon or early in the evening is the best time to water. If it rains significantly, of course, you should avoid over-watering.

When to Mow and Treat 

You don’t want to mow the new grass until it is well-established. Wait 2 to 3 weeks after the sprouts appear or until the blades are over 3 inches high.
Also avoid applying weed killer or fertilizer to newly planted grass until it is established. These chemicals can actually burn tender new plants.  

Brown Patch Repair

In an established lawn with bare or brown spots, start by digging up the browned areas. Apply more soil if needed. Treat the bare spots as if they were little patches of new lawn, and follow the above steps for seeding a lawn.
You could also purchase grass patch—a dry green foam infused with seed and fertilizer—to place over the bare patches. Simply apply and keep moist until grass sprouts.


Read more: http://www.doityourself.com/stry/how-to-plant-grass-seed#ixzz0yQidORk6